A little back story: Once upon a time, around December 2007, Mr. Blog received the Mr. Beer Premium Edition Beer Kit (it's the really big box under the tree).
Step 1: Studying the instructions. I didn't want a repeat of Step 4.5 from Project Cheese. We also watched Alton Brown's Good Eats beer episode for extra information.
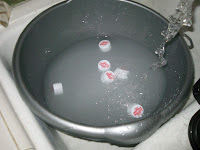
 Step 2: Cleaning everything! The instructions included a number of ominous warnings about bacteria making the beer taste like farts, so we took great care in the sanitation process. The kit comes with a special sanitizer for the keg, the measuring cups and the utensils, but Mr. Blog and I took the extra pre-caution of sanitizing ourselves as well.

Here are our supplies ready to go!
 Step 3: Cooking the booster. The booklet in the kit said that "booster" is designed to enhance the flavor of the beer. I had never heard of "booster" and Alton Brown didn't mention it so I assumed it was a secret Mr. Beer product.
 Turns out, it's just dehydrated corn syrup solids so we were just making a big pot of corn syrup.
 Step 4: Adding the mix. This is where Mr. Beer hides the real beer ingredients like hops and other grains.
 As you can see, we're making West Coast Pale Ale.
  Step 5: Putting it all together. Look at Mr. Blog's fine pouring form! I give it a 9.8.
 Here, he's stirring in the yeast.
 Alton Brown suggested that we use bottled water and who are we to disagree?
 Mr. Blog and his baby beer!
  Step 6: Fermentation. The young beer has to ferment for 7 - 10 days to let the yeast convert the sugars into alcohol. Mr. Blog wrapped our baby up to protect it from harm and...

... kept the room at exactly 72 degrees.
 Step 6.5: Tasting the young beer. What? We couldn't help it!

It was pretty good considering it was warm and un-carbonated.
Step 7: Bottling and carbonation. Mr. Beer carbonates its beer in the bottle (by adding sugar to each bottle for a second fermentation). Again, we start by sanitizing everything.


... adding sugar...
 ... filling the bottles...
 Fermentation, round 2. We somehow ended up with more beer than would fit in the bottles that came with the kit, hence the bottle that doesn't belong.
 Step 8: Aging. Who knew beer had to age? And that it's done in the fridge (we gave up food for a while so there would be room for the bottles in there)?
 Step 9: Enjoying! Here's Mr. Blog taking our finished product out.
 ... opening...
 ... pouring...
 ... admiring... (these pilsner glasses were also part of Mr. Blog's Christmas present from that year... I etched a whole set and they spell out his name; yay me!)
 ... drinking...
 *YUM* I really like how the beer turned out. It's light and crisp and really refreshing. Mr. Blog and I definitely plan on giving Mr. Beer another go (but this time being creative with the mix) before trying grains, hops and yeast on their own.
This batch made two gallons of beer so we have plenty; come by and have some!


2 comments:
holy moly--you've made your own *BEER*?!?!?! most impressive! (my fave pic is mr blog at the fridge with the finished beer! awwwwwww!!! sooooooo happy!!!)
lemme know when you embark on "PROJECT CHAMPAGNE" and i will be right over!!! :)
My dad used to make his own beer. I never acquired a taste for it... do you serve cosmopolitans?
Post a Comment